Designing & manufacturing a custom handgun red-dot mount
Introduction #
Until recently, I didn’t have a 1911 in my safe. I had to fix this and bought a BUL Armory 1911 Trophy in .45 ACP.
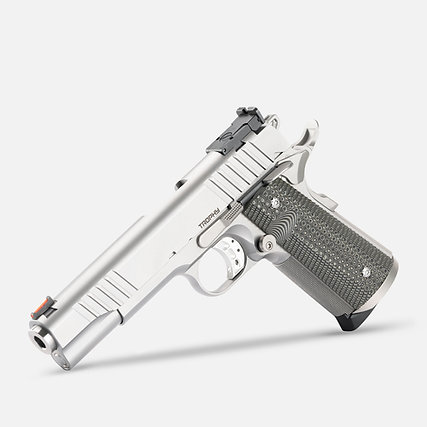
BUL Armory really makes great value firearms: I got it for €2350 and it has all the features you can wish for: light & crisp trigger, adjustable rear sight, fiber optic front sight, front and back serrations on the slide… everything except one thing: it does not come optic-ready. Worse: to this date, there is no aftermarket red-dot mount for this pistol.
This was a real bummer for me as I’m a red-dot addict and I thought I could easily find a mount for this model. After days of searching for a red-dot mount and asking on forums, I decided that I would make one myself.
This was a big challenge for me because first, I never built anything like that, and even if a red-dot mount does not look complex, it must:
- Be designed and manufactured with great precision to fit both the red-dot and the gun (typically using a dovetail).
- Have a small footprint to avoid modifying the balance of the gun and still allow to use the mechanical sights if possible…
- … while not moving or breaking when shooting.
Choice of the red dot #
Before making the red-dot mount, I had to choose… the red-dot! 1911s are pretty small in width compared to other handguns because they are usually single-stack. In order to avoid having a huge mount which would be much wider than the slide (which would look bad), I searched for a red-dot with a very small footprint.
I chose the Holosun 507K X2 because it has the smallest (or close to) footprint of all red-dots while still offering all the features you can wish for:
- Small dot (2 MOA) for precision shooting or big 32 MOA ring for rapid shooting
- Adjustable brightness
- Wide windage/elevation adjustment range (+/- 50 MOA)
- Shake Awake feature (turns off when the gun is not in use, turns on instantly when the gun is picked up)
- Easy to change battery on the side of the red-dot
- Integrated rear-sight (very useful for our use-case!)
Also, Holosun has now established a good reputation in the red-dot market.
Design #
The design of the mount can be split into two “virtual” parts (it’s actually one part in reality of course):
- The top part where the red-dot will rest and will be fixed with screws
- The bottom part which will be responsible for attaching to the gun with a dovetail
⚠️ Even if I split these two parts in this article for understanding purposes, you will need to consider both parts at the same time when modelling the part in 3D, because it’s actually a single piece in reality. I suggest you read the entire article before attempting to do your mount.
Software #
I never designed any 3D object meant to be manufactured before. I went with Autodesk Fusion 360 which is free, has a rather big community to find tutorials and help, and has more than enough features for what I needed to do.
Top part #
To be able to design the mount, I started by measuring the red-dot dimensions with my caliper… while you might be forced to do this if the manufacturer of your red-dot did not release the technical drawing, I can guarantee you it’s really painful and very inaccurate. For example, the Holosun 507K has rounded corners with a specific angle which is impossible to determine by hand.
Hopefully, Holosun released the technical drawing of the 507K footprint: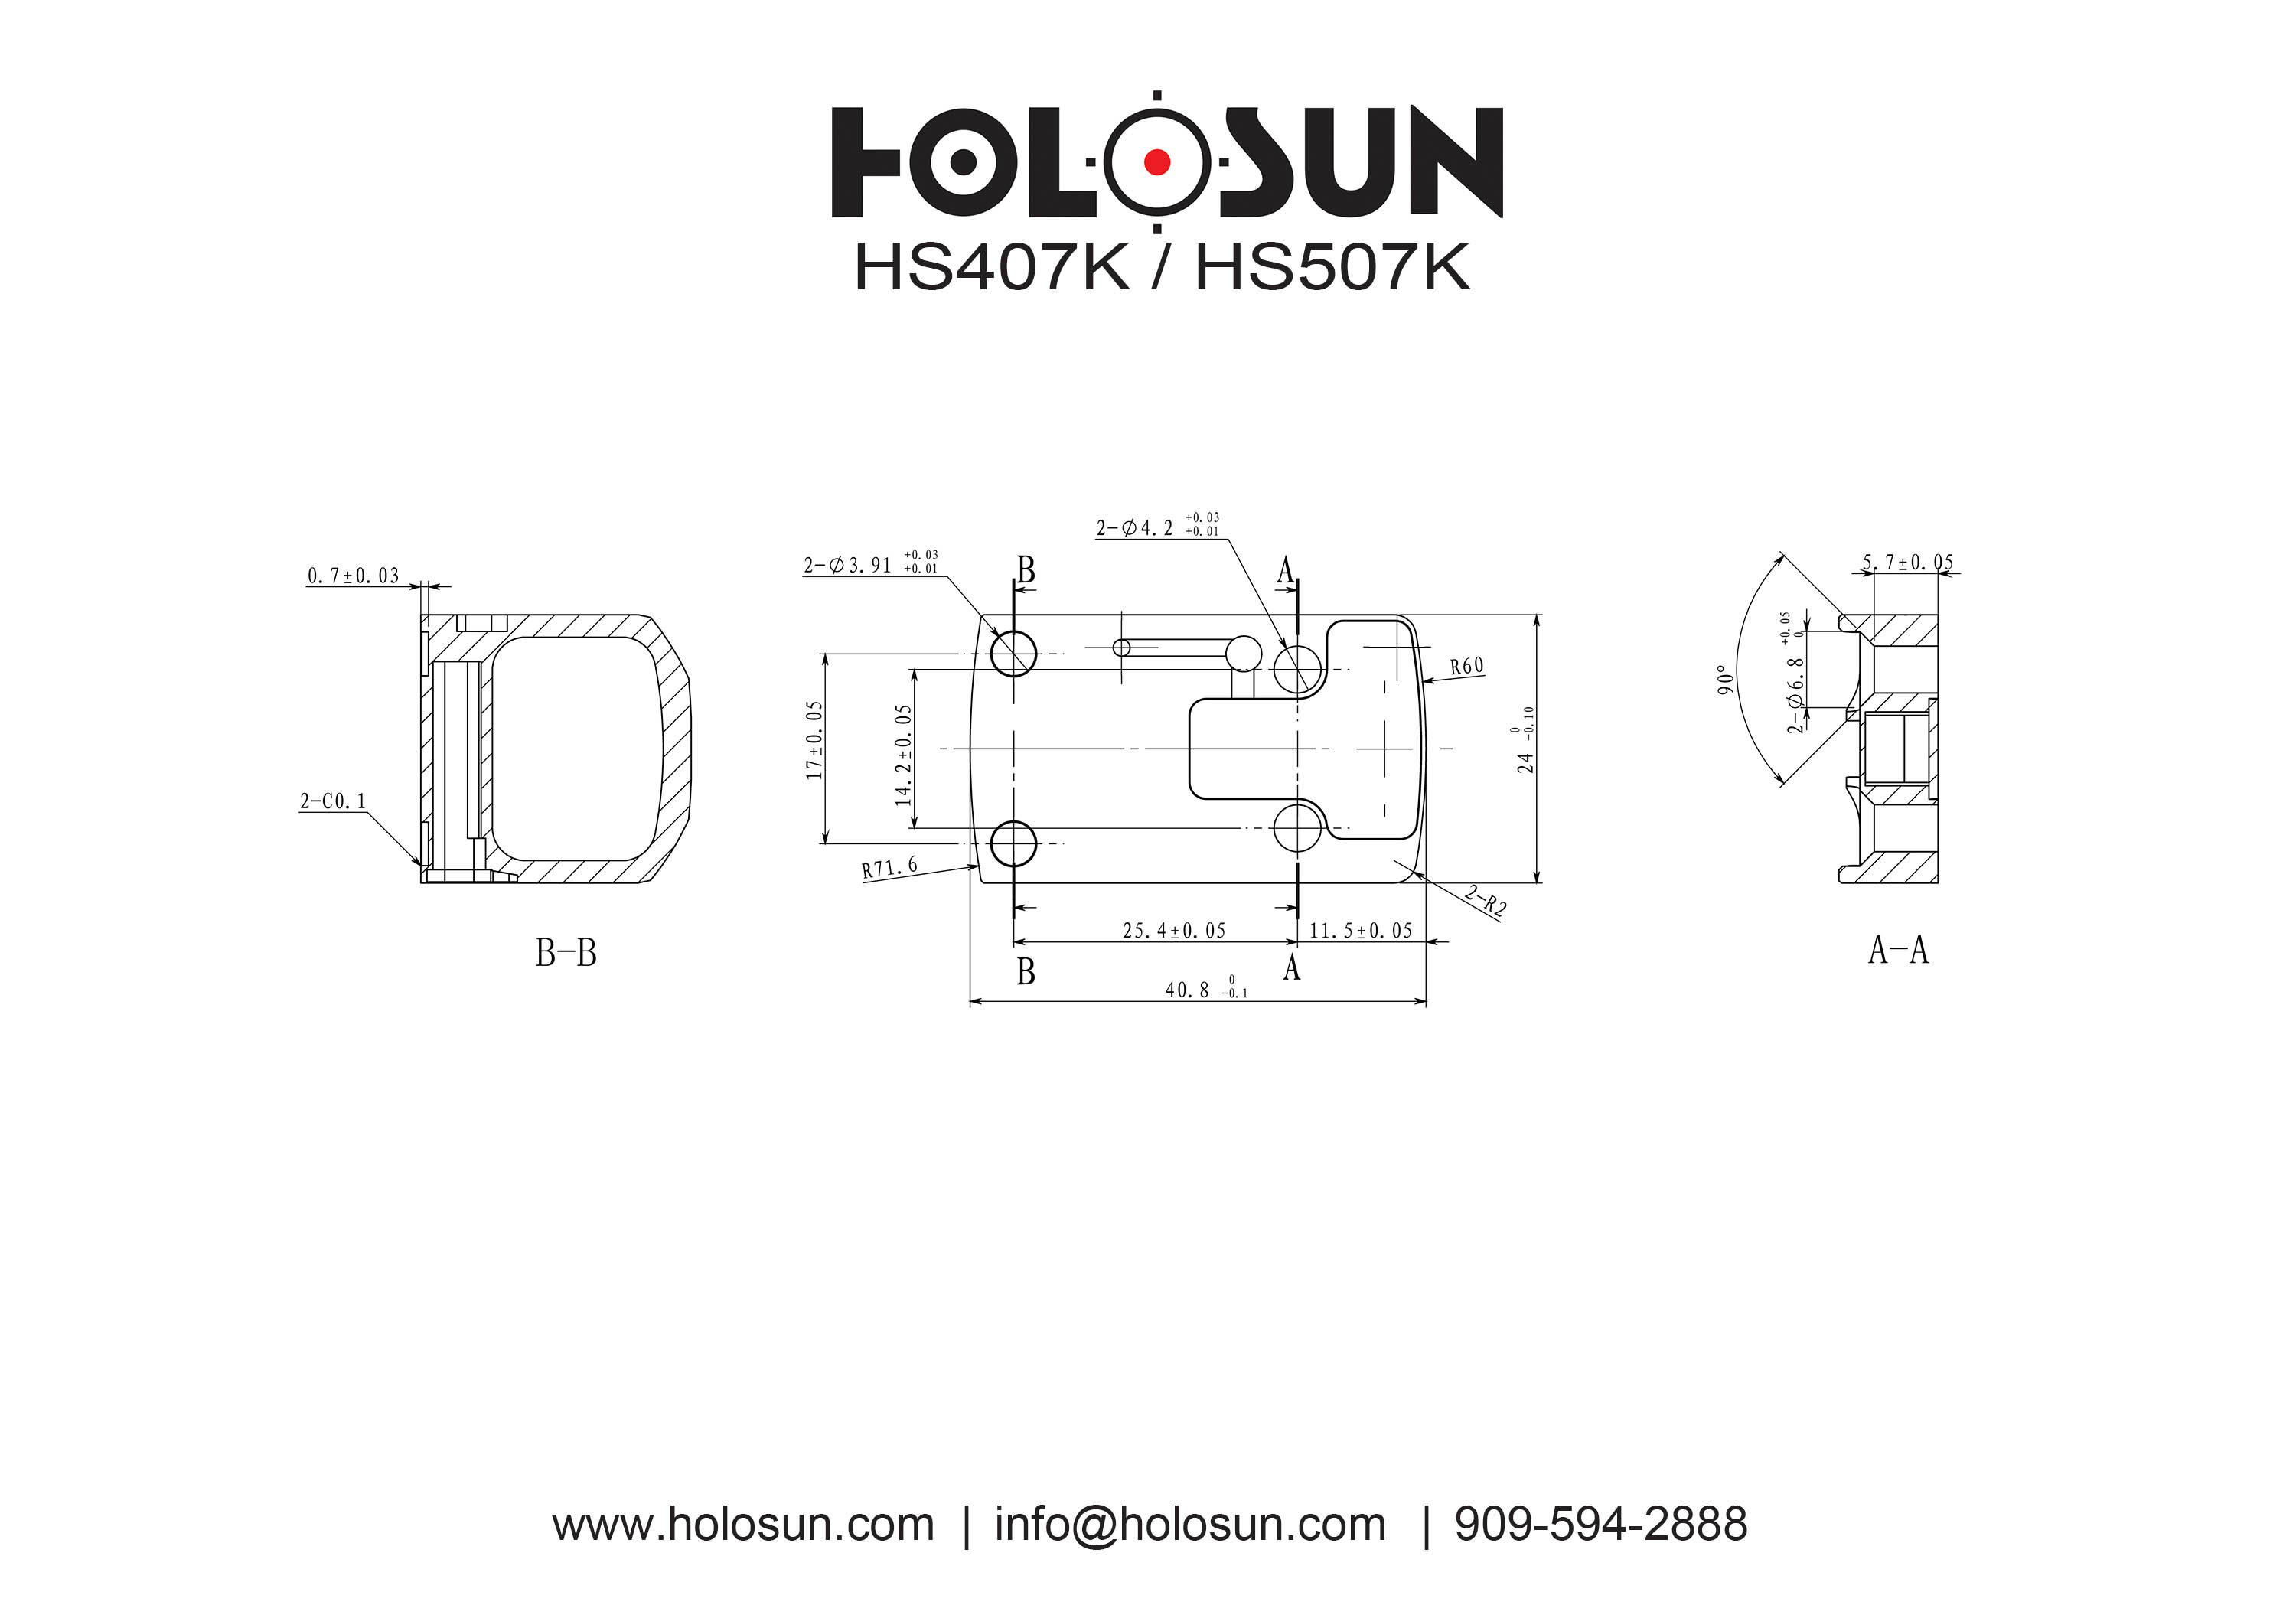
From there, “all” you have to do is replicate the same dimensions in your 3D modelling software. Although it might seem simple enough to just “replicate” the dimensions, if you never did this kind of things, expect to spend several days on it to first learn how to actually read the technical drawing and then do the 3D modelling.
Bottom part #
The top part was pretty straightforward: there was almost nothing to think about because it’s “just” replicating the technical drawing given by Holosun. However, for the bottom part, it gets more complicated.
Dovetail #
First, the dovetail on the gun: what are its dimensions? They are not given by the manufacturer, so I had to measure on my gun: after dozens of measurements (and some trigonometry as well), I came up with:
- 65° for the angle
- 0.102in for the height
- 0.330in for the width
Now, where should the dovetail be on the mount? Indeed, there are three main things to consider:
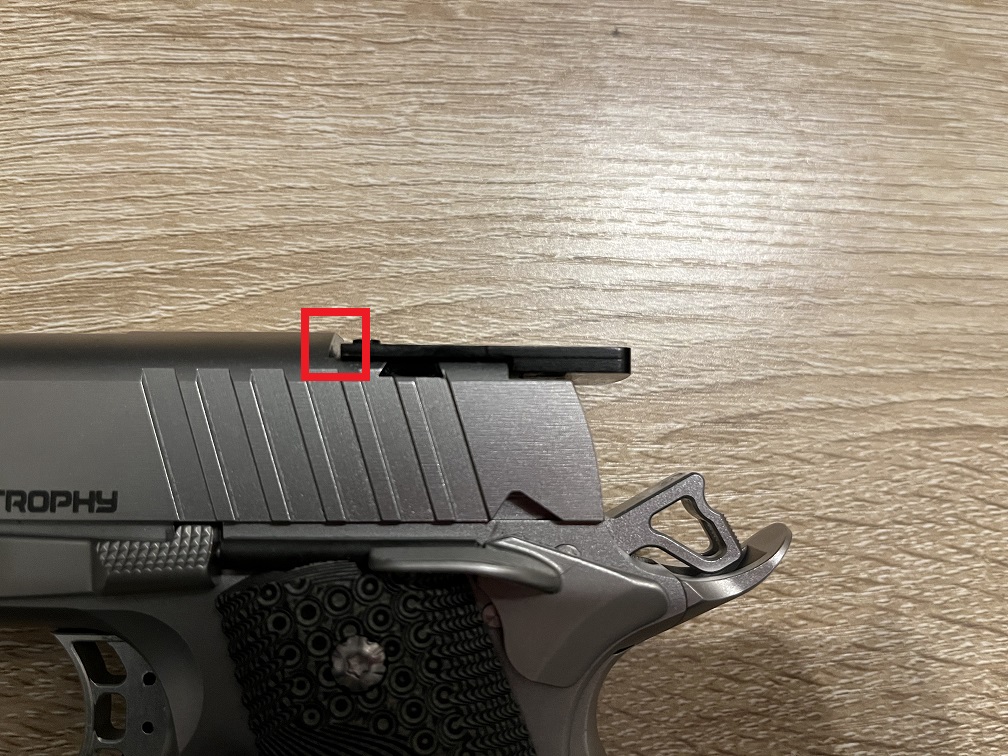
- First, there is not much space in front of the dovetail on the gun because there is a “front wall” as shown on the picture below (in the red square). We could make the mount go over this “front wall”, but then it would make the mount very high, which would look bad, probably feel weird when aiming, and also make the front sight unusable.
- If we don’t want to go over this “front wall”, we can put the mount more in the back of the gun (so we have enough length without needing to go over the “front wall”), but then it will be on top of the hammer: of course we don’t want the hammer to strike/be blocked by the mount, otherwise the gun will just not work.
- So we need the back of the mount to be thin enough not to block the hammer, but at the same time thick enough to be able to screw the red-dot into the mount.
To satisfy all these constraints, I ended up with the following dimensions (this is a screenshot of the left view
of my mount in Autodesk Fusion 360):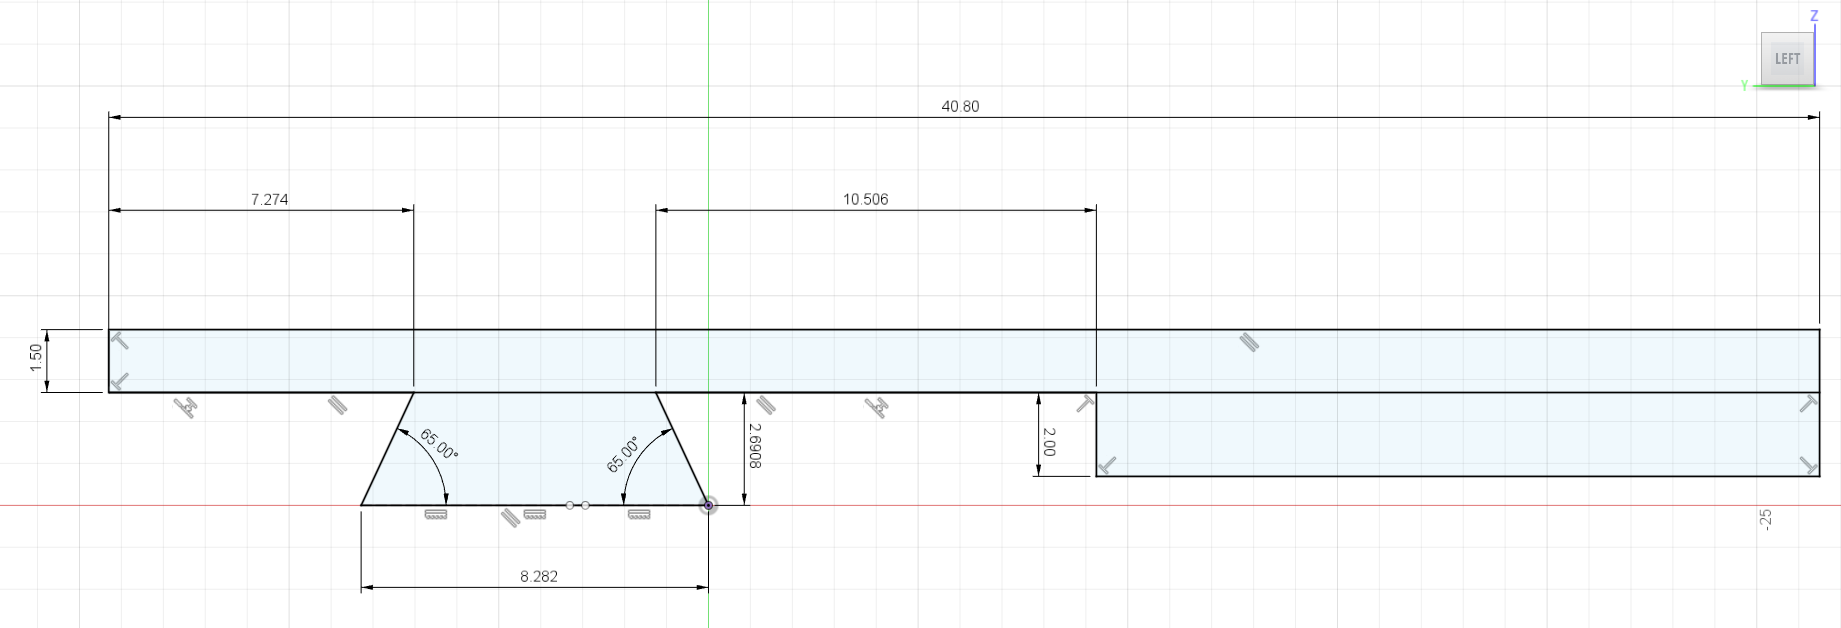
As you can see:
- The total height of the mount is only 4.19mm (1.50mm + 2.69mm)
- The total length of the mount is 40.80mm (exactly the same length as the red dot)
- The total width of the mount is 24.00mm (exactly the same length as the red dot, not visible on the screenshot)
Red Dot Screws #
For the red dot screws, the HS 507K X2 comes with both M3x10 and M4x10 screws. Either of them would work, but I went with the M3 ones, mainly because there is very little matter to screw in, so the smaller diameter the better. Indeed, we generally want at least the diameter size in threading depth (e.g. for a 6mm diameter screw, the minimum threading depth should be 6mm), and our plate is only 3.5mm thick at this place, which wouldn’t be enough for M4 screws (which are 4mm in diameter).
Set Screws #
Finally, to make sure the mount doesn’t move in case the dovetail would not be “tight” enough, many commercial mounts have set screws. These are headless screws that you tighten against the gun itself (so the holes are through-drilled holes).
I chose to put two M4x4 set screws like shown on the screenshot below. This time, we can choose M4 screws because at
the place of the dovetail, the thickness is 4.19mm, which is greater than the screw diameter (4mm).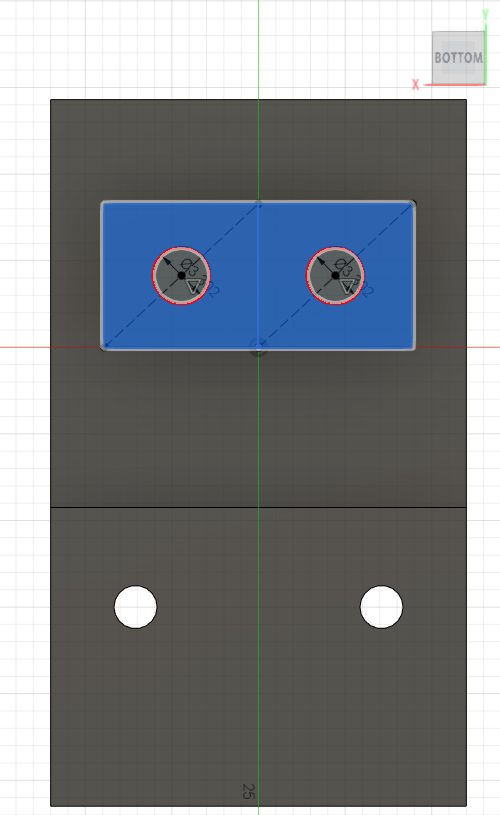
As you can see on the picture below, it’s the perfect length (4mm) so the screws are flush: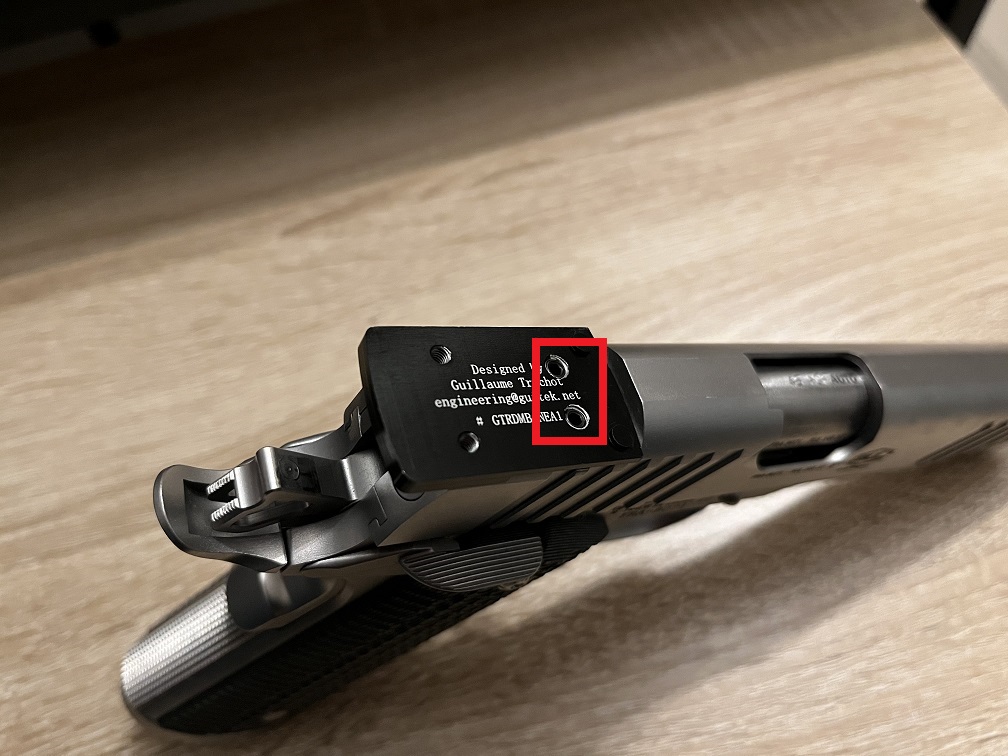
Manufacturing #
Material #
Most the red-dot mounts are manufactured in 7075 Aluminum with a type 2 or 3 (hardcoat) anodization, so I just went with this as well.
Tolerances #
Because of the dovetail which requires pretty fine tolerances, I went with the ISO 2768 “Fine” specification.
Production #
At that point, I needed to find a way to manufacture the part… and it turned out to be much more difficult than I expected:
- The machines required to do this kind of part are very expensive and bulky, so it’s not really an option to buy them
- The factories usually won’t bother working with individuals, and if they do, the process is very cumbersome and manual (like, there is no website or API, you have to speak to people on the phone 😬)
Hopefully, a company tackled these issues and made manufacturing of prototypes enter the 21st century: Xometry.
You just sign up on their website, upload your 3D file, select the options you want (which material to use, are there threaded holes, etc.), pay, and that’s it! It’s not cheap, I paid €149 for the part (which is a rather small piece of aluminum in the end), but it’s 100% custom and it’s basically the only option available, so I’m completely fine with the price!
It took close to 1 month between the order and the delivery, but the part was made to the exact specifications, I’m very satisfied with Xometry’s service!
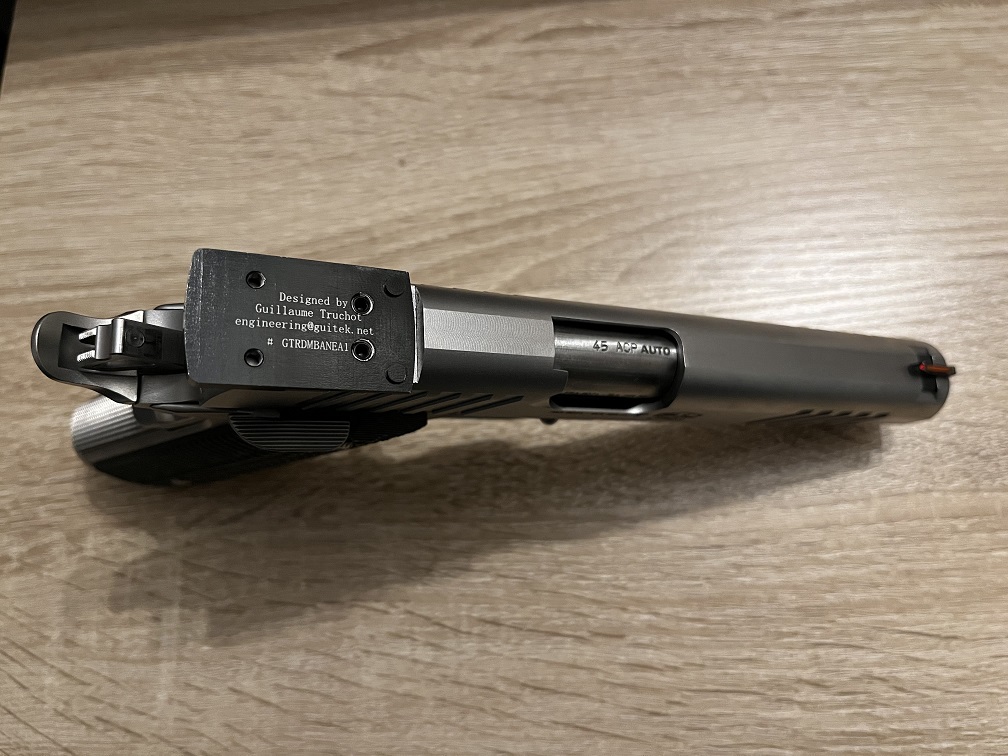
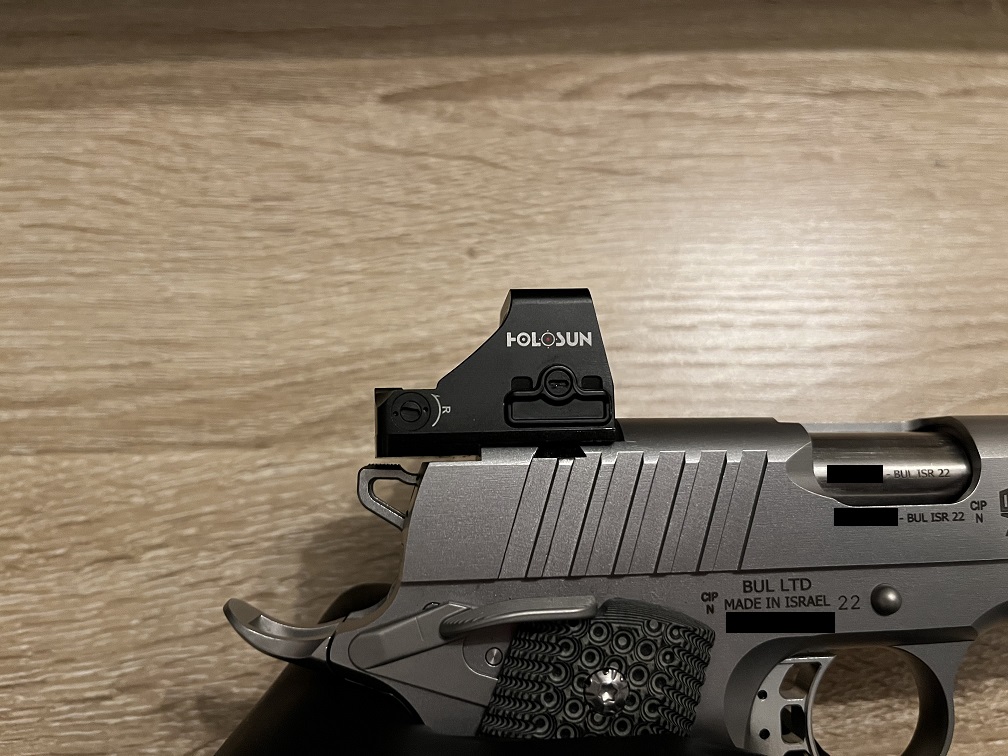
Final result #
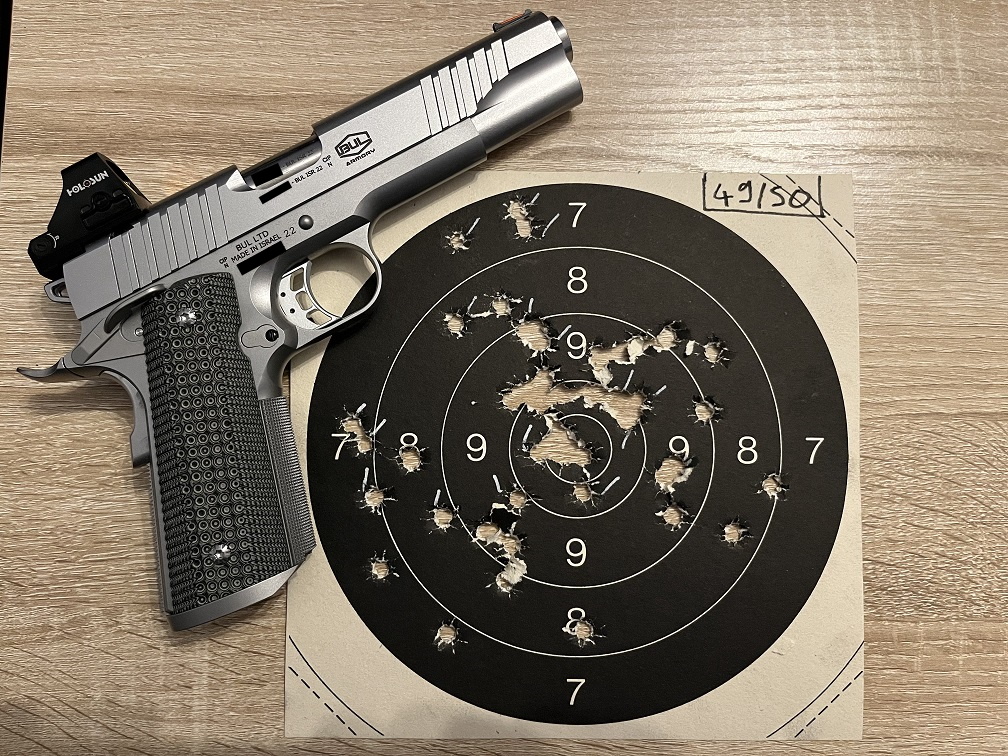
As you can see, everything fits perfectly and the overall footprint of the mount + red-dot is very small. Given the target I did (see below: 50 shots, target 25m away), I think we can safely assume the mount holds well and does not move.
I shot hundreds of ammo since then, and the mount/red-dot still hold zero perfectly! I couldn’t be happier for my first project of this kind 🎉 !